Welcome back!
So you are ready for part 2 of How to use Photoshop? We are going to share how to add icons and text to your imagery, whether it be for a poster, flyer, other marketing materials or just for fun – in this case we are going to do ‘for fun’.
Here’s the 6 steps to adding text and icons to your photograph in Photoshop.
- Let’s say you still have the image open from Part 1 you need to select the T (for text) Text tool on the left side toolbar

2. Click on the image with the text tool and ‘Lorem Ipsum’ will appear. Type the text you want to add – in this case “Happy Birthday”. Don’t worry if the placement of the text isn’t where you want it this can be changed at any point.

3. You then need to select the font you want. If you select the font bar, a whole list of fonts will apprar for you to choose from. Scroll down > Select (again, at any point you want to change the Typography on your image, you can)
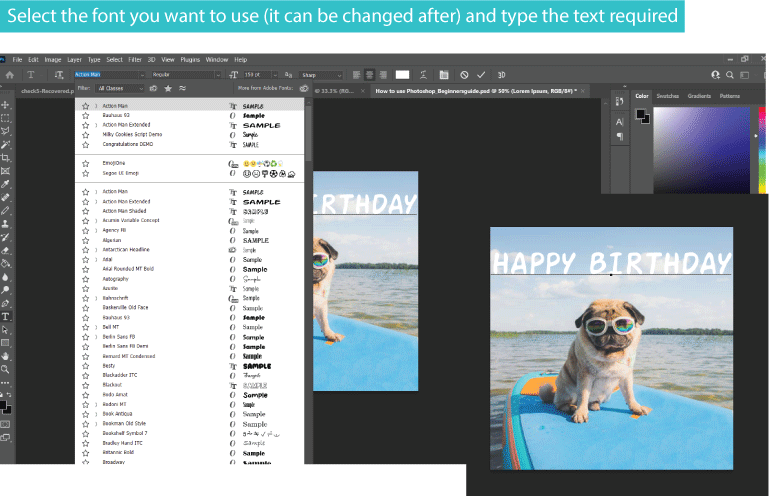
4. To edit the colour of the font – click on the coloured box in the top tool bar (in this example it is yellow – but on your screen it may be white or black or the last colour you have used). Double click, then you can select from the colour spectrum any shade you desire! Exciting hey!?
Once you are happy with the colour > OK
Next we are going to add an icon – in this example as party hat. Select your image and use Ctrl+c and Ctrl+V to copy and paste to the image. You could also draw your own icon, but hey steady on this is only lesson 2, let’s save that for another day!

5. Using the arrow tool, you can move the icon to the position on your image you want it to be
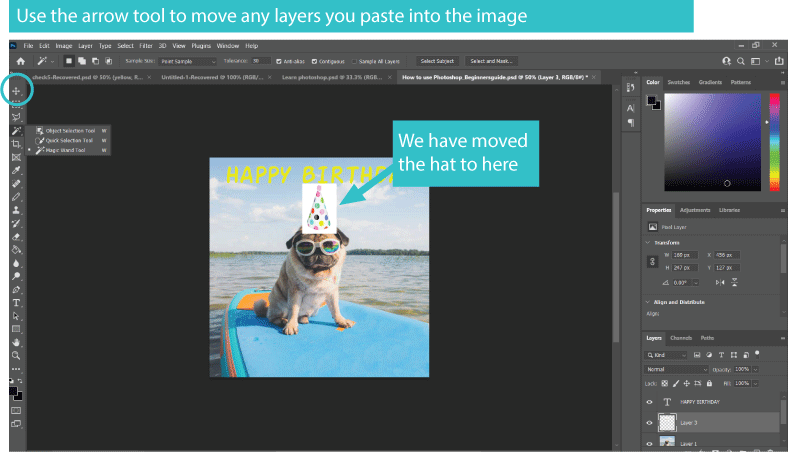
6. We then want to remove the white background around the party hat, so using the magic wand tool as featured below, click on the white area. A flashing lasso will appear on the white area, simply hit the delete button and the white will DISAPPEAR!

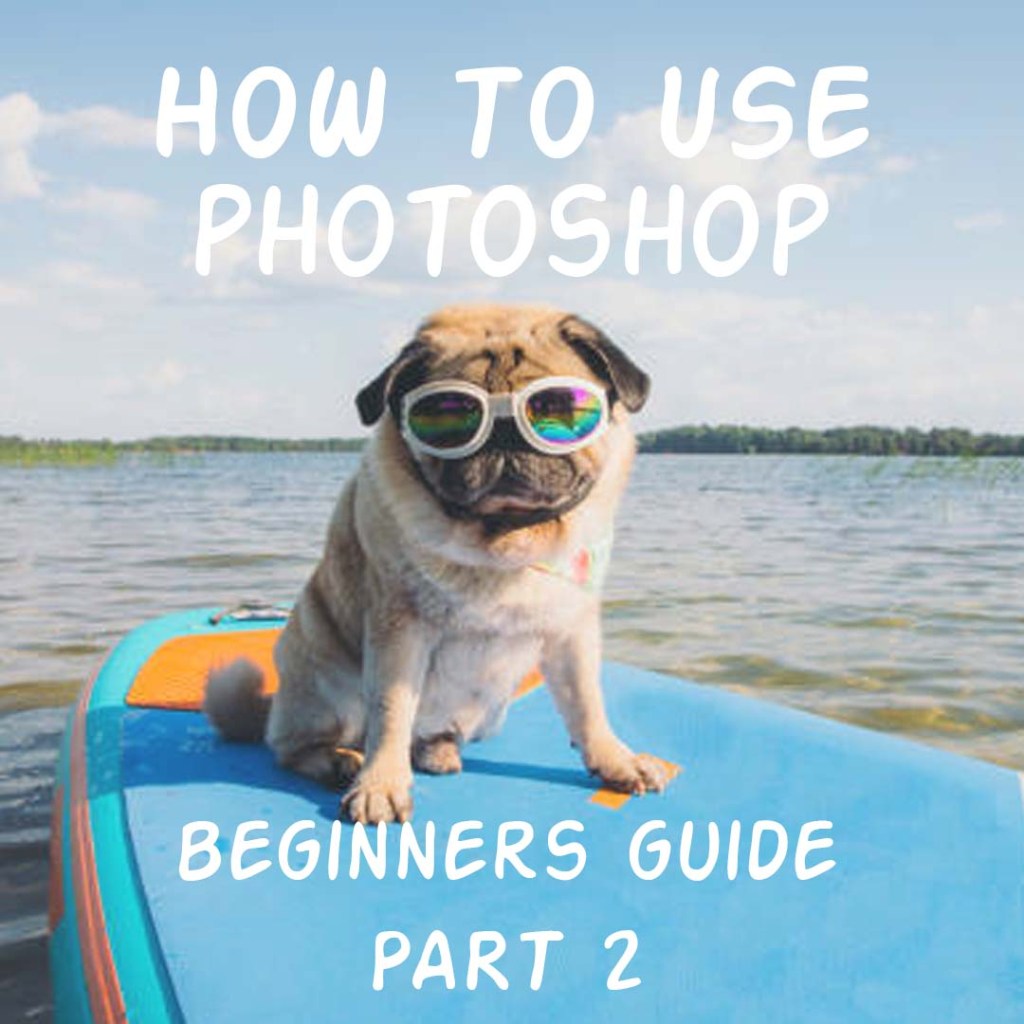
7. Now using the Transform (Ctrl+T) tool we used in Part 1 you can change the hats size, position or angle so it sits on the dogs head better. We also used the Arrow tool to move the Typography to a more suitable position! Hey Voila, my job here is done and you have turned your fun loving pet into a great birthday card!

We hope you enjoyed these steps in our How to use Photoshop lesson, please share this post with your friends and family too so you can start sending fun pictures and cards to one another!
Don’t forget there is so much more to learn on Adobe Photoshop so just Click here to purchase our hourly training sessions for Photoshop or Illustrator
Leave us a comment below, share with your friends or sign up to our blog for more tips and tricks.
We look forward to teaching you again soon.
Luella’s Design Studio


Leave a comment